
How is a built-in wardrobe fixed to the wall?
In home design, the choice of wardrobe is a crucial link. In addition to traditional free-standing wardrobes, more and more families tend to choose built-in wardrobes. This kind of wardrobe can not only save space, but also perfectly integrate with the interior design and enhance the overall aesthetics.
So, what is a built-in wardrobe? How is a built-in wardrobe fixed to the wall? This article will answer these questions in detail and provide you with some practical installation suggestions.

What is a built-in wardrobe?
A built-in wardrobe, also known as a closet, refers to a fixed wardrobe that is embedded in the wall or reserved space and seamlessly connected to the wall, floor and ceiling. It is usually designed in the bedroom, corridor or dressing room and becomes part of the room structure. This design not only saves indoor space, but also can be customized according to the needs of the user and the characteristics of the room, so that the wardrobe is consistent with the overall home style.
The advantages of built-in wardrobes include:
1. Save space: The built-in wardrobe utilizes the wall space to maximize the available area in the room, which is very suitable for small apartments or families that need to make high use of space.
2. Beauty and integration: Built-in wardrobes are integrated with the wall and can be customized according to the room's decoration style, making the overall appearance more unified and harmonious.
3. Customized design: Users can choose the internal structure of the wardrobe according to their needs, such as hanging area, drawers, shelves, etc., and decide the height, width and depth of the wardrobe.
4. Increase the sense of neatness in the room: Since built-in wardrobes are usually designed inside the wall or flush with the wall, they do not take up floor space, making the room look neater and more spacious.

What are the components of a built-in wardrobe?
Before understanding how to fix a built-in wardrobe, we need to understand its basic components:
1. Cabinet: This is the main structure of the wardrobe, usually composed of back panels, side panels, bottom panels, top panels and partitions. The material of the cabinet can be solid wood, composite panels, metal, etc., and the specific choice depends on the design requirements and budget.
2. Door panels: The door panels of built-in wardrobes can be selected as flat doors, sliding doors or folding doors. Different door panel designs will affect the use experience and appearance of the wardrobe.
3. Tracks and pulleys: For the design of sliding doors or folding doors, tracks and pulleys are key components that determine the smoothness and service life of the door panels.
4. Hardware: Including clothes rods, handles, hinges, drawer rails, etc., these accessories directly affect the functionality and durability of the wardrobe.
5. Finishes: The exterior finish of the wardrobe can be selected according to the overall style of the room, such as wood grain veneer, paint finish, glass, etc., to increase the beauty of the wardrobe.

How to install a built-in wardrobe?
The installation steps of a built-in wardrobe involve design planning, wall treatment, wardrobe assembly and fixing. The following are the general steps for installing a built-in wardrobe:
Design planning and measurement
Before installing a built-in wardrobe, detailed measurements and design planning are first required. Measure the dimensions of the room, including the height, width and depth of the wall, and determine the location and size of the wardrobe. In addition, the layout and traffic lines of the room need to be considered to ensure that the opening and closing of the wardrobe and its use will not be affected by other furniture or structures.
The design stage also needs to determine the internal layout of the wardrobe, such as the distribution of hanging areas, shelves, drawers, and the type and style of door panels. These factors will affect the ease of use and storage capacity of the wardrobe.
Wall preparation
In order to ensure the stability and safety of the built-in wardrobe, the preparation of the wall is essential. If the wardrobe is installed on a load-bearing wall or brick wall, additional reinforcement is usually not required. However, if it is installed on a non-load-bearing wall, a lightweight partition wall or a gypsum board wall, reinforcement is required to increase the load-bearing capacity of the wall.
Reinforcement methods include installing steel structures, keel frames, or using reinforced expansion bolts, chemical anchors, etc. in the wall. The reinforced wall needs to be strong enough to support the weight of the wardrobe.
Wardrobe assembly
According to the design drawings, first pre-assemble the various components of the wardrobe, including the cabinet, partitions, drawers, door panels, etc. This step can be carried out in an open space outside the room for easy operation. When assembling, special attention should be paid to whether the connection of each component is firm, whether the door panel is installed flat, and whether the slide rails and pulleys are smooth.
For large built-in wardrobes, you can consider assembling them in modules, and then fix each module to the wall one by one.
Fix the wardrobe
After assembly, the next step is to fix the wardrobe to the wall. First, move the cabinet to the predetermined position and ensure that it fits tightly against the wall, floor and ceiling. Then, fix the wardrobe to the wall by the following methods:
● Wall fixing: Fix the side or back panel of the wardrobe to the wall by using expansion bolts, chemical anchors or self-tapping screws. Expansion bolts are suitable for brick walls or concrete walls, while chemical anchors are suitable for occasions with higher load-bearing capacity.
● Ground fixing: If there are supporting feet or bases at the bottom of the wardrobe, it can be fixed to the ground with screws or expansion bolts to increase the stability of the wardrobe.
● Ceiling fixing: For taller wardrobes, the stability of the wardrobe can be further enhanced by connecting the top plate to the ceiling. At this time, special attention should be paid to the structure and material of the ceiling to choose the appropriate fixing method.
● Side fixing: For the side of the wardrobe against the wall, the wardrobe can also be connected and fixed to the wall by L-shaped angle iron or other metal brackets to prevent tilting.
During the fixing process, the position of the wardrobe needs to be constantly adjusted to ensure that it is vertical and level and flush with the wall, floor and ceiling. After the fixing is completed, check the firmness of each connection point to ensure that the wardrobe will not shift or tilt due to use.
Finishing and finishing
After the wardrobe is fixed, the final finishing and finishing work is required. According to the design requirements, install decorative panels, skirtings, corner lines, etc. to make the wardrobe coordinated with the overall style of the room. For places with gaps, sealants or decorative strips can be used to fill them to prevent dust from entering.
Finally, install the hardware of the wardrobe, such as handles, hinges, drawer rails, etc., and check whether all door panels open and close smoothly and whether the drawers slide freely.

How to maintain and care for built-in wardrobes?
Once the built-in wardrobe is installed, it becomes part of the room. In order to extend its service life, it is necessary to regularly clean the surface of the wardrobe with a soft cloth or duster to avoid dust accumulation. For places that are difficult to clean, a vacuum cleaner or a small brush can be used. Secondly, the interior of the wardrobe should be kept dry to prevent clothes from getting damp or moldy. In humid seasons, moisture-proof agents or dehumidification bags can be placed in the wardrobe. In addition, regularly check the wardrobe for signs of insect infestation and use insect repellent for protection.
In addition, regularly check the hardware of the wardrobe, such as handles, hinges, and slides, to ensure that they are functioning properly. If they are found to be loose or rusty, they should be repaired or replaced in time. Although the built-in wardrobe is designed to be sturdy, excessive load should also be avoided. Especially in the hanging area and drawer area, too much clothing or items may cause deformation or damage. In addition, the interior of the wardrobe should be well ventilated to avoid odor or mold growth caused by long-term closure. You can open the cabinet door regularly, or place activated carbon bags, aromatherapy bags, etc. in the wardrobe.
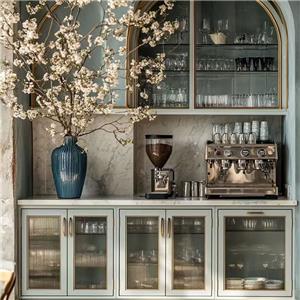
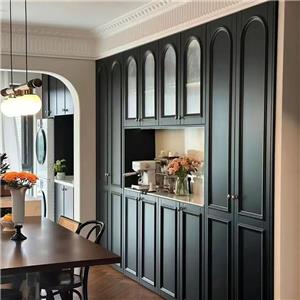
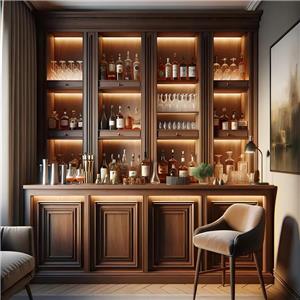
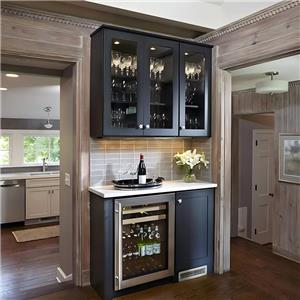
Affordable Custom Furniture from Gagaluna
Whether you're furnishing a home or outfitting a commercial space, Gagaluna has the perfect solution. Our Foshan-based factory produces custom cabinets, wardrobes, and bar furniture using top-quality materials like aluminum and acrylic. We provide competitive pricing, bulk discounts, and promotional offers to meet your needs. Partner with Gagaluna for stylish, cost-effective designs.